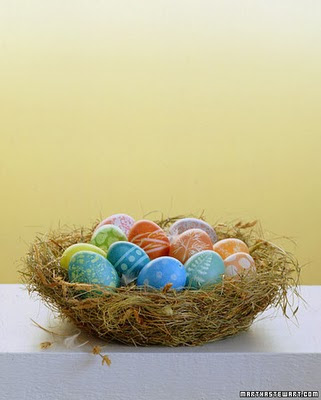
Dyeing Easter Eggs may seem like something everyone knows how to do, but I have to admit, I haven't done this since I was a kid. Now that I'm a mom to an almost 3 year old, it's time to brush up on this important life skill. My daughter is a curious little thing and my most favourite times lately is when we're doing an activity together. I'm sure most of you know this out there, but if there are any egg dyeing novices like myself in blog land, I will share a step by step done by the one and only Martha Stewart. Who, by the way, has some good recipes for Easter Brunch (which I'm also hosting this year). When did I become so domestic!? Enjoy...
Egg Dyeing Basics
Eggs and dyes are the two central elements of Easter crafts. Decorating eggs perfectly isn't hard; just follow our tips. If you want to save eggs from year to year or turn them into ornaments to hang from branches, blow them out instead of hard-boiling the eggs before dyeing them. Tip: Try dyeing different types of eggs in order to vary the sizes -- use quail for smaller and goose or ostrich for larger. Also consider dyeing brown eggs to alter the range of colors you can produce.
Step 1: Blow Out the Eggs
To empty a raw egg, begin by using the tip of a sharp utility knife to pierce both ends of the egg; turn the knife in one of the holes to widen it slightly. Then, poke a straightened paper clip through the larger hole to pierce and "stir" the yolk. Hold the egg, larger hole down, over a bowl, and then blow the contents out with a
rubber ear syringe.
Step 2: Dye the Eggs
Protect your work area with paper towels or newspaper. Mix 1 teaspoon of vinegar and 20 drops of food coloring (use more to intensify color) in 1 cup of hot water in a heatproof bowl, cup, or jar deep enough to let you submerge an egg completely.
To create different tints of a color, vary dipping times: Submerge eggs for less than 5 minutes for light colors, and leave the egg in for 10 minutes or more for deeper shades. Using tongs makes handling the eggs easy.
To make a two-color egg, dye the whole egg first in a light color, let dry for 15 minutes, and then submerge half into a darker color (this idea works best for hard-boiled eggs).
 |
| Look at that drying tray - only Martha! |
A drying rack made with pins and foam board keeps things neat
From here, you can get really fancy and add masks, make multi-colour eggs, add stickers etc. I'll stick to the basics this year!


Ooooh brings back memories!! This is a really good idea and I love the pastel colors. HAPPY EARLY EASTER !!
ReplyDelete~ Tracey ~